I was playing in my sewing room recently, making some fun shaped pillows to update our home in various areas and drew up this big BIG LIPS pillow pattern!
The PDF instructions and Pattern File are posted as a FREE file for you to grab, but I wanted to walk through a few visuals on the blog here to offer extra tips, especially if you are new to sewing with Shannon Fabrics' Cuddle® minky fabrics.
First of all, go visit the Shannon Fabrics' website and scroll to the bottom of the page and check out their sewing Tips and Tricks, then join the I Love Cuddle® Fabric facebook group to be inspired by all the gorgeous projects from the community of Cuddle® fabric superfans!
Now that you know the basics, print out the Big Lips pattern, tape it together, and use it to cut two from Luxe Cuddle®, mirroring the second one by flipping your pattern over. I like to outline the pattern with a silver or black sharpie and use the pattern like a quilt template and simply outline the pattern piece. I transfer the little "L" brackets as marking to remind me that I need to leave those areas open when I'm stitching around the whole shape.
Once you have the pieces cut out, you will need to pin the pieces together, right sides together. When you pin, you want to make sure that you are really controlling the fabric, so pin parallel to the cut edge, and then run a second line of pins next to the first line of pins - this keeps the fabric from wiggling away from you and from the other piece that you are sewing it to.
Use your walking foot to do all your sewing on your LIPS, and sew with 1/2" seam allowances leaving the gaps between the "L" brackets open on the top AND bottom of the lips. We need an opening on both top and bottom because we need to stuff each lip separately. You will see what I mean in a minute. Remove your pins before you run over them with your walking foot. If you find that your material is bunching, even under the walking foot, try loosening up the PRESSURE on your Presser Foot (check your manual for exactly how to do that on your machine).
Once you have stitched around the LIPS completely, except for the two gaps on the top and bottom of the LIPS, go through one of the openings and turn the LIPS right side out.
Secure the fabric with a couple of pins, then stitch across the fabric following the curved line you drew with that same straight stitch at 3.0 mm length.
Can you believe that is all the machine sewing that you need to do? This next part is SO fun. Stuff the TOP and the BOTTOM lips on your pillow. You need to stuff with small bits of Polyfil to start, to make sure that you fill in the corners of the pillow well before you plump up the middle of the lips.
Once your lips are as full as you like, you can use your favorite closing stitch to close up the two openings.
To give your fluffy BIG LIPS pillow an extra fancy finish, use a stiletto tool to fluff out any of the long fluff of the minky fabric that might be trapped in the seaming of the front and back. Just run the point of the stiletto over the trapped fibers and watch the fibers fluff out like magic!
Enjoy!!
XOXO, Sheila
]]>Freestanding lace embroidery is a technique where designs are created using only thread, without any fabric or backing material. This technique results in delicate, intricate designs that require nothing but thread to become a beautiful finished piece. Freestanding lace Easter eggs are made using this technique and are a beautiful addition to any Easter décor.
To make freestanding lace Easter eggs, you will need an embroidery machine and the appropriate embroidery design. These designs are available for purchase here at Designs by Babymoon. They come in a variety of sizes and styles, allowing you to create a unique collection of Personalized Freestanding Lace Easter eggs.
Once you have your design, you will need to gather your supplies. This includes thread in the colors of your choice and two layers of fabric-type water-soluble stabilizer. You may need hardware, ribbons or other embellishments to complete the design.
To begin, hoop the water-soluble stabilizer, and stitch out the first color of your design, being sure to match the bobbin thread to the top thread with each color change. Then, change the thread color and stitch out the next color. Continue this process until your design is complete.
Once your design is finished stitching, carefully remove it from the hoop and trim away any excess stabilizer. Soak the egg in water, following the manufacturer's instructions for the stabilizer you used. This will dissolve the stabilizer, leaving you with a delicate, lace-like egg.
These freestanding lace Easter eggs can be displayed in a variety of ways. They can be hung from a tree or placed in a decorative bowl or basket. You can also attach a ribbon or string to each egg and use them as ornaments. Think of who might love to receive a beautiful egg bookmark! There is no end to what you can do with these Freestanding Lace Easter Egg designs.
In conclusion, freestanding lace Easter eggs are a unique and beautiful way to decorate for the holiday. They are perfect for those who love to buy embroidery designs and are looking for something new and exciting to add to their collection. With a little creativity and some basic embroidery skills, you can create a beautiful collection of Easter eggs that will be cherished for years to come.
]]>Here are the simple steps to create simple FSL Earrings from Designs by Babymoon
You will need:
Got everything? OK! Let’s stitch!
Hoop 2 layers of the washaway stabilizer in your hoop. Run the colors of the embroidery piece on the stabilizer, matching the bobbin color to the top thread color as close as possible. The PDF Color Map is just a general guide to the shades of colors that I originally designed the file in. You do not have to use the exact thread colors or the exact brand. On some designs it makes sense to get as close as possible, but you are always free to use colors that you like the best! Be sure to trim any starting or ending loose threads as they come up instead of waiting until the very end. This ensures that your embroidery is as clean as possible. After all the stitching is complete, remove the stabilizer from the hoop and rinse it away with warm water.
Dry between clean, absorbent towels by pressing the water out in the fluff of the towel. Dry the embroidery pieces flat. Insert the tiny prongs of the Pinch Bail earrings into the top of the embroidery, wriggling threads apart without breaking them. Squeeze the pinch bail closed with flat pliers, being careful not to mar the surface of the pinch bail. You may also use these tiny free standing designs as miniature ornaments or even patches by adhering them with Patch Attach or other permanent fabric glue or by hand stitching them on.
Have fun with these tiny designs and be sure to show them off in the Designs by Babymoon Friends and Fans Facebook group!
Freestanding Lace Earrings Quick Tutorial by sheila.ryan.tx
]]>
If you've ever been frustrated by the dreaded instruction to "quilt as desired" at the end of a piecing pattern, Christa Watson fills in all the blanks for you and holds your hand through the entire process! She doesn't leave any part of the quilt, and even includes methods to bind your quilt. The meat of this book, though are so many ways to consider quilting your quilt on your domestic sewing machine. Whether you are just starting your quilting journey or have been quilting for years, there are good things for you in Christa's new book! I encourage you to dive in with me and have a look!
]]>If you are new to quilting in general, that is new to piecing cut fabrics together to make an entirely new and different piece of fabric, you can start with this book and get a really good lesson on not just the quilting part of quilting, but the whole process from start to finish. The quilting part of quilting (while the primary focus of this book), that is making of the quilt sandwich and stitching layers of the top, batting, and backing together with decorative stitching is often intimidating even for experienced piecers, and I know that I’m not alone in having a collection of unfinished tops that are sometimes years past their start date. At least they got started, right?
But there is SO much good instruction in this book. Christa encourages the novice quilter to relax and find fun in the process of piecing, and offers numerous tips for choosing fabrics so that even imperfections in piecing and quilting are less noticeable. It’s a welcome encouragement to play and find a rhythm that works for any quilter. For those who have been piecing and quilting for many years, Christa’s words of experience are a great reminder of ways to not skimp on the important pressing details and choosing quality materials including thread and batting so that the finished quilt will withstand the test of time. It’s always nice to have a gentle refresher course and see the craft with a fresh perspective!
The meat of the book is where Christa’s instructions really shine. She goes into so much detail showing you with clear, beautiful photographs how to get an amazing quilt sandwich together for quilting, then she spends much of the rest of the book showing you how to use your regular domestic sewing machine to do the actual quilting on your quilt. This fills in ALL the gaps to so many of those patchwork patterns that simply say “Quilt as desired”. That is really the place that stops so many quilters from turning those pieced tops into usable quilts, and Christa fills the rest of the book with thoughtful practice exercises, shows you how to use both your regular sewing machine foot as well as you walking foot. She includes LOTS of clear diagrams that are illustrated as well as a photographed example, so that there is no question about how the instruction could end up looking. I love the section on free-motion quilting the most because that is where I find so much zen in the quilting process. Christa includes some simple but effective freemotion ideas to try that really add a new layer of interest to the finished quilt. It’s not just the specific design ideas that Christa includes, but also a reminder of the practical steps to start the free-motion quilting process. It’s really the next best thing to actually watching someone set up their quilt to start the quilting, thanks to the bright and clear photography that shows just where to put your hands to best wrangle your quilt!
There is a section on combining free-motion quilting with ruler quilting to get a wonderful “custom quilting” look for your quilt, and the way Christa explains the process, the reader is left with the idea that this custom quilting is within their reach from the very beginning. I so appreciate the inclusion of all kinds of quilting techniques for all stages of quilters. Quilting doesn’t need to be difficult, but it does take some careful thought and lots of quilters get overwhelmed with the quilting part because they’ve put so much time and brain power into the piecing part. It’s so nice that Christa has broken down the quilting process into such simple, accessible steps and given sample plans for quilting sections or the whole quilt. Not only that, but if you are a beginning beginner, Christa includes all the steps for three different full sized quilts so that you can piece a top and get it completely quilted by following the steps she has outlined so thoroughly for you. This book fully fills in the gaps to those patterns that get you to the end and leave you with “Quilt as desired”, but Christa goes beyond even that and details even the process of binding your quilt by hand or by machine. She wants us to get those quilts finished and out into the world, and hasn’t left a single thing out. I know that no matter where you are on your quilting journey, you will get a lot out of this book. Go ahead and pull out that stack of pieced tops and let’s get our quilts DONE!
For more information, you can check out How Do I Quilt It? on Amazon (https://read.amazon.com/kp/embed?asin=B0B5W1NLHT&preview=newtab&linkCode=kpe&ref_=cm_sw_r_kb_dp_FYTRSA2KNT934RPG4PC0&tag=designsbybaby-20) or get a signed copy from Christa Watson herself at her own website ( http://christaquilts.com). Watch her video introduction over on YouTube (https://www.youtube.com/watch?v=5bLnLBfJPUk) and discover how you might find this book a necessary part of your quilting resource collection!
Thank you, Christa, for writing such a careful and encouraging book! I look forward to getting that quilting done sooner rather than later now!
]]>
|
|
What do you when you are stuck at home? Crafters have lots of ideas! Over in the Designs by Babymoon Friends and Fans group we’ve had a lot of discussion about what we can do without going out. This IS the reason right here that we’ve been holding on to craft supplies!!
Add your ideas to this list and let’s help the non-crafters learn how we use our secret “craft therapy” tools to get through anxious times!
Here’s are my top ten crafts to do while stick at home:
1) Embroider ALL the things! Just start with your own bath and kitchen towels as practice!
2) Start a quilt. Youtube is FULL of amazing instructional videos for quilting. I’m a huge fan of Missouri Quilt Co.
3) Attack that stack of mending. I know I know— it’s not fun, but if you have all this time you could knock that out!
4) Learn the features of your embroidery machine that you haven’t explored yet!
5) Crochet some granny squares! Even if you don’t make an entire afghan you still end up with cool trivets for your table!
6) Try a new embroidery project! Zipper Bags or other In The Hoop Projects, Mylar embroidery, or stitching on purses or backpacks. What don’t you already know how to do?
7)Organize your sewing stash. What do you really have in that big pile?
8 )Learn that embroidery software! Do you know the details in combining letters for monogramming? Have you tried all the buttons in there to see what they do?
9)Pull our unwanted material and supplies to share with a younger crafter and help build their stash
10)Teach someone else something. Are there children off of school in your home? Give those idle hands done fabric and thread and see what happens!
We crafters have incredible tools at our disposal. How are you going to use them to make your world a more beautiful place? #stayhomeandcraft
Also, don't forget about the Birthday Sale!! 49% off all designs with code 49ANDFUN when you have at least $12 in your cart! I've listed 6 new designs today so you can get that cart up to 12 with new designs easy! Sale ends 3-7-2020 at midnight CST.
]]>
|
|
How about Double Sided Luggage Tags! You complete them in TWO hoopings, doing the back pocket part first, then the from decorative part. I’ve been wanting to get this done for ages and just had t finished up a good enough tutorial, but it’s finally ready! There is a very detailed (and longer than most!) tutorial for these included in the design set as well as a terrific video explaining each step in detail.
https://www.youtube.com/watch?v=Zf3F3rHGUBk
Each different design includes a decorative front design plus the pocket side. Each design can be used separately if you don’t want to do it double sided, but I encourage you to try out this technique! These make really great luggage tags or baby shower gifts as diaper bag tags! So many great options! And there are many more designs already in the works that are just being tweaked.
What do you think? Would you try a double sided project??
Here is the link to add the Double Sided Luggage Tags that are up right now but stay tuned because there are MORE to come!
https://designsbybabymoon.com/search?q=double+sided
New Brothread 63 color Set 500m spools https://amzn.to/2JFKSYS
Lace Zippers 20 piece 12 inches https://amzn.to/2CCZT7D
Thread art medium tearaway 8x8 sheets 100 pieces https://amzn.to/2usAMzW
Hot Fix Crystals with tweezers and sticky pencil https://amzn.to/2X7gDLO
Jewelry Punch 1.8 mm hole https://amzn.to/2Jey9sz
Hot fix crystal starter kit with a hot fix tool https://amzn.to/2X8M2O1
Earwires - double J (or S style) https://amzn.to/2FDPees
Jump Rings (with a set of nice pliers!) https://amzn.to/2JietEl
Keychain, Zipper bag SHORT Tassels https://amzn.to/30d43ww
Kam Snap Pliers starter Set https://amzn.to/2lwiCMC
Kam Snaps Shape set https://amzn.to/2lxWvW7
Hardware Organizer for snaps and key fob hardware https://amzn.to/2lxhXKQ
Brother PE 800 https://amzn.to/2lzF3k9
ThreadArt 100 yard roll tearaway stabilizer https://amzn.to/2lyq89K
Rivet Set https://amzn.to/2VG3Cd6
New Brothread Stabilizer cutaway 8x8 https://amzn.to/2M8v2Fl
I hope you enjoy shopping for goodies to make embroidery fun and easy for you! It's a great time to be around when Amazon can get these things to us so quickly!
Shop Amazon Warehouse Deals HERE
Try out Audible for listening to great books while you work!
]]>
I hope these help you add your own beautiful finishing touches to your wonderful handmade, hand-crafted and artisan goods!
Oh! And don't forget about the current 50% off sale when you use code TREAT in your shopping cart!
XOXO,
Sheila
PS: Swing by the facebook group to see more great ways people are using these mini label designs!
]]>
No minumums, no limits. Just grab a whole handful of great designs for your treat bucket!
Click here for the discount to automatically apply to your entire cart of Ridiculously Cute Embroidery Designs and get a head start on your holiday stitching!
]]>But where do you start? Here I will share a few time-tested tips for not only choosing pleasing colors, but also show you where to find some of my favorites.
Current Trends:
Seasonal Colors that will show up in the stores will usually be announced a couple of seasons ahead by PANTONE. Who is PANTONE? Well, they are the ones who pick which colors are going to be used by the entire fashion industry - both for apparel and home goods. The create trend reports and really steer the direction that world goes in fashion wise. Their trend reports are always free on their website (linked here to the Fall 2010 US page) (You can choose to see the trend reports for Europe as well by looking at the London link)
Now that you know what the industry is moving toward you can make some good decisions for what colors you will choose for your projects!
One thing to keep in mind, is that any embroidery is considered a durable application - it's not as trendy as Heat Transfer Vinyl or Scrapbooking, even though there are plenty of uber-trendy designers creating up to the minute embroidery designs that reflect things in the pop culture. Machine embroidery, or even had embroidery is meant to last and be enjoyed for many seasons and years, and even passed on as heirlooms when worked on quality materials.
Having said that if you are a seller of embroidered goods at all, it is good to keep up with all of the current style trends. Your work will stand out at the market as relevant and familiar to what people are seeing in the mall or at high end retailers. Embroidery is, after all, a high end application and people expect to pay more for long lasting goods.
I love looking at the trend reports, especially when I am thinking of fall craft shows! Looking at this year's trend forecast, I love to see the rich hues of navy, green, and red included in the Fall Pallette (called Evening Blue, Biking Red, and Guacamole this time!) The Blue and the Green are their foundational core shade colors, so you can expect to see a lot of that in the stores when you are building a fall wardrobe. The other trendy colors are more accents that you will see a lot of in the prints and For embroidery, you can build on this foundation by choosing similar background colors (you don't have to get specifically Pantone numbered shades but something similar will keep you trending in the right direction!) Their other foundation colors, Vanilla Custard and Paloma are timeless cream and grey shades that are perfect foundations for table linens, scarves, evening wear and the basis for heirloom embroidered goods.
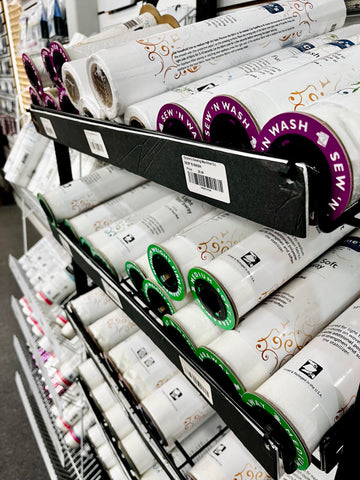
How would I use these colors? I start thinking now of materials I have on hand for what I plan to create. Navy and grey vinyl? Got it! Joann's carries this inexpensively in their upholstery department.
Guacamole? Biking Red? In the vinyls that I love to use I will turn to online retailers like My Punkbroidery, the Vinyl Nest, and Blue Pumpkin Vinyls to find the perfect shades! There are so many great places to purchase vinyl from but these are my regulars and I'm never disappointed with their quality!
My Punkbroidery has this gorgeous Crimson Promo Vinyl, or this rich Fine Wine Promo Vinyl . For a green I absolutely love this LIME PATENT VINYL so much. I love all the patent vinyls but this lime is perfect for the Guacamole component of a fall embroidery pallette. Can't you just see awesome navy monograms on the lime patent? ::swoon::
From Blue Pumpkin Vinyl I'd pick some of the cool Cowboy vinyl sheets to use as backgrounds for embroidered in the hoop projects. I love the rich but subtle textures of this rich brown Cowboy Vinyl and any monochromatic embroidery would be gorgeous on it and make beautiful accents for your in the hoop projects of table accessories! I can just see elegant napkin rings and placecards made from this material!
What about the Color of the Year Living Coral? Now that the year is more than half over is this color to fall away? I carried a purse earlier in the year made from this color, but I'm kind of tired of it, but I can see that by exploring the color harmonies further down on the page I can carry this into the fall by adding some coordinating accessories like beautiful tags or bag charms that can carry me into the fall for sure! The contrast of the color harmonies really freshen up a color you may be tiring of! If you haven't played with coral yet, you might pick up some of this Salmon Premium vinyl from The Vinyl Nest for some of your in the hoop embroidery projects!
I hope you have fun playing with gorgeous fall colors in your embroidery work this fall! There are so many directions you can go and I'd love to see how you make them part of your life!
]]>
Seriously. Unless we can talk about sewing! #sorrynotsorry
]]>
|
|
I get four or five emails PER MONTH about people losing all their embroidery files on their computers. I am always happy to resend the links to re-download your purchases, but since it’s the first day of a new month it’s good to be reminded to back things up.
A lot of people store their embroidery files directly on their computer, which is really a dangerous place to keep them.
Why? Well, your computer is not infallible. The hard drive can be corrupted, you could get a virus, the whole computer can be destroyed in a home disaster even be stolen. Your computer is NOT a good place to keep your files.
Some people use an external hard drive. I think extra storage is great, but these can fail just like a computer or laptop internal storage device can, so it’s still not a safe backup.
What about CD’s of USB’s (dare I mentione floppy disks?). These again are only temporary storage devices. USB’s are great for getting designs to your machine or working between computers. They are so convenient and portable! But they too can fail! I’ve personally “worn” a couple out, like physically they just fall apart after repeated use. CD’s are even more fragile. They scratch, crack and warp way more easily than you might imagine.
What’s the solution, then?
I always recommend a reliable online or cloud based storage system. Personally, I use both Google Drive and Dropbox (yes, backed up to each other!) as well as iCloud storage. I pay yearly for the peace of mind of keeping my business files, photographs, and embroidery designs “in the cloud” instead of at my house. This means if something happens to my computer I can still access my stuff from wherever. It means I can work “anywhere” literally, from public access computers, from a friend’s house if I need to, from my iPhone, or other device, really anywhere.
I’m not getting paid by either of these places to tell you to back up your files (and most likely you don’t need nearly as much storage as I use in designing embroidery files for commercial use!), but I plead with you earnestly to spend some time backing up your files. You never know what could happen!
By the way, both google drive and Dropbox are both free up to a certain amount of storage, and even their paid plans are very affordable considering the heartache of lost files.
If something big enough in the world happens to either Dropbox or Google there is something really big and bad happening in the world, and we most likely won’t be worrying about embroidery at that point, if you get my drift.
Go back up your files, friends! I want your embroidery files to have long, happy lives!
]]>]]>
|
|
Spring Bunny Hop April 5 thru April 11
This Easter Hop has been in the works for a while now. There are multiple designers per day. Remember, it's your choice if you want to be in the groups and download their designs. This is a great way to learn new designers or build your collection from some you already trust! It's all for fun, so mark your calendars.
Here's a list of the current groups, there will also be daily post reminders when the time comes.
Most groups have questions to answer. They aren't to harass you, they are to TRY to help us keep out spammers.
April 5
https://www.facebook.com/groups/1157836291020298
https://www.facebook.com/groups/1013248052111178
https://www.facebook.com/groups/EandOAppliques
https://www.facebook.com/groups/273674133256885
April 6
https://www.facebook.com/groups/159514814747378
https://www.facebook.com/groups/akidzcreation
https://www.facebook.com/groups/STFAFanGroup
https://www.facebook.com/groups/rosebarnembroiderydesigns
April 7
https://www.facebook.com/groups/BabymoonBoutiqueEmbroideryDesignsFans
https://www.facebook.com/groups/348085789276285
https://www.facebook.com/groups/575923619470367
https://www.facebook.com/groups/210413509640672
April 8
https://www.facebook.com/groups/EmbroideryDesignsandBeyond
https://www.facebook.com/groups/PhantomDesignZ
https://www.facebook.com/groups/honeybearstudio
https://www.facebook.com/groups/BellaBleuEmbroidery
April 9
https://www.facebook.com/groups/krisrhoadesdigitizing
https://www.facebook.com/groups/AZEmbroideryDesigns
https://www.facebook.com/groups/SueOVeryDesignsGroup
https://www.facebook.com/groups/PrettyNStitchesEmbroidery
April 10
https://www.facebook.com/groups/Fit2BStitched
https://www.facebook.com/groups/MyChaoticEmbroidery
https://www.facebook.com/groups/CherryBombVinyls
https://www.facebook.com/groups/ytdesigns
April 11
https://www.facebook.com/groups/237614080440920
https://www.facebook.com/groups/1456547467800229
BONUS:
https://www.facebook.com/groups/ShowoffyourEmbroideryCreations
Love is in the air with the Buy one get it free “Puffy Heart Snap Tab Design
]]>I can, though, express my love for you through my talent, so I’m sharing this new Puffy Heart style Snap Tab Design as a Freebie when you buy any other design that is 2.99 or over. You will have so much fun stitching these out for your friends, family, class party or craft show booth. They really do bring a little love to any situation. Wouldn’t they be the best sugar-free treat for all those you love? And just think, absolutely NO bitter aftertaste!
I would absolutely love to see how yours come out! We are kind of in a heart-making frenzy in our Facebook group, so join us and show what yours look like!
How many hearts will you share this Valentine’s Day?
XOXO,
Sheila
]]>
Here are the special codes we’ve created for you!
BlackFriday50 gets 50% off $40+
BlackFriday30 gets 30% off $25-39.99
BlackFriday25 gets 25% off $10-24.99
BlackFriday20 gets 20% off $9.99 or less
Enter the code you want to use at the checkout screen and your files will be emailed to you automatically!
Enjoy stitching out beautiful embroidery designs as gifts, for your holiday craft shows, or for your own enjoyment!
Dont forget to join our Facebook group so you can share your stitch outs, be the first to hear about new designs and get inspiration for your next project!
]]>
12 awesome designers are sharing great freebies for the next 13 days in their Facebook groups. I’m posting over in the Designs by Babymoon Friends and Fans Group to let you know where to go to find out about each freebie so please stop by Facebook, join the group and get in on the fun! I have a new freebie listed just for the Turkey Trot, but you need to run over to Facebook to see how to grab it!
]]>Oh wait, we are talking about embroidery, right?
Here are my favorite suppliers for all the things I use when making snap tabs:
Marine Vinyl
I love the marine vinyl from Joann's. It's easily available and not terribly expensive when you consider that a snap tab takes only a 4' by 4' square or just slightly more if you are making multis (that's multiples in a single hoop, usually a 5x7 hoop). Marine vinyl is durable and smooth and sews like a dream.
Specialty Vinyl
This is where it gets fun. Sometimes I find remnants of cool upholstery vinyl in my local independent fabric shop and sometimes I get lucky and get scraps (literally scraps, but these are really just small pieces that we need, right?) from a couple of upholstery shops that save them for me. I have found leather, glittery vinyl, beautiful high end upholstery pleather that has become some of my favorite things to sew with when I have a special project in mind. Lately, I have two favorite online retailers that I get small rolls or sheets from. My Punkbroidery is absolutely amazing and has a huge selection of thinner vinyls, canvases and unique vinyl products like the amazing white geo glitter that you see on so many of my design samples. I also am just crazy about the patent vinyls that I am getting from there as well. And the selection of printed vinyl sheets from My Punkbroidery cannot be beat. Shipping is fast, which only seems to feed my need for more and more of these amazing vinyls.
A new shop I've recently fallen in love with is The Vinyl Nest. The owner is a fellow digitizer and knows exactly what we embroidery enthusiasts are looking for when we want a new embroidery vinyl product. The Premium Vinyl products they offer are so smooth and luxurious and they are thin and beautiful. And I love the glimmer canvas and the printed vinyls they offer. Shipping is fast, which is so nice when you need a vinyl fix!
Not so secret inside info: On the backs of nearly all my snap tabs and in the hoop projects I use blackboard vinyl from Joann's. It's super thin and not "sticky" like vinyl sometimes gets in humid weather, so it doesn't grab the bottom of the machine. Also, it's extremely durable and fairly inexpensive.
Hardware
When making snap tab embroidery projects (like the adorable new Llamacorn snap tab that came out today!) you will want to attach some sort of keyring or d-ring attachment so that your cute project can be displayed and utilized to it's fullest potential. My snap tab designs are carefullly designed to fit a 1.25" splt keyring (the last batch I ordered was from Craft Chameleon and they are SO pretty!) I also love using 3/4" swivel lobster clasps. This is the seller I get mine from - but I order 200 at a time. You may not need that many, so getting just a few from My Punkbroidery might be a better place to start.
Snaps
The tabs that are on my snap tab designs work best with the size 20 kam snaps that I get from I Like Big Buttons. Seriously I think they have a million different colors and shapes.
If you really want to know - I'm a big fan of Isacord embroidery threads. There is nothing that my machines like better and I always have consistent results. I have tried many other brands of embroidery thread and I always go back to Isacord. It's worth it to minimize my frustration by using quality materials instead of working too hard to make skimpy materials do and then being sad about the result.
I hope this list was helpful in your new snap tab making adventure! Please let me know if you run across other great sellers of supplies! I love finding new things to use in these fun projects!
]]>
These are very simple steps for making your own In the Hoop Snap Tab embroidery design project!
All the steps for each snap tab are basically the same, so here are some simple steps.
Here is a fun video on how to make your own snap tab if video is easier for you to follow along with:
https://www.youtube.com/watch?v=J2EWQYTZTtk
]]>